Boss Laser HP3655 CO2 Laser
Boss Laser • Model: Boss 1630 (100W)
100W CO2 Laser cutter with a 16" x 30" cutting bed, LightBurn software integration, and honeycomb bed.
Safety Rules & Guidelines
DO'S
DON'TS & WARNINGS
Public Reference Tables
Approved and Forbidden Laser Materials
Materials to use and not use in the CO2 LaserBoss Laser Material Recommended Settings
Recommended Speed (mms), Power (%), and Air Assist settings for 100W CO2 Laser.Processes & Operations
Boss Laser General Use
1 StepsProcess Steps:
Turn On the laser
Turn the key to Turn on the Laser and press the Red emergency stop laser.
Detailed Step Operations:
Machine Startup
Let the Machine boot up. You might see an image of the previous user's project pop up on the display screen.
Turn on Chiller and Exhaust Fan
Behind the laser there is a surge protector that powers the chiller and exhaust fan. Turn this on.
Lightburn Walk Through
3 StepsProcess Steps:
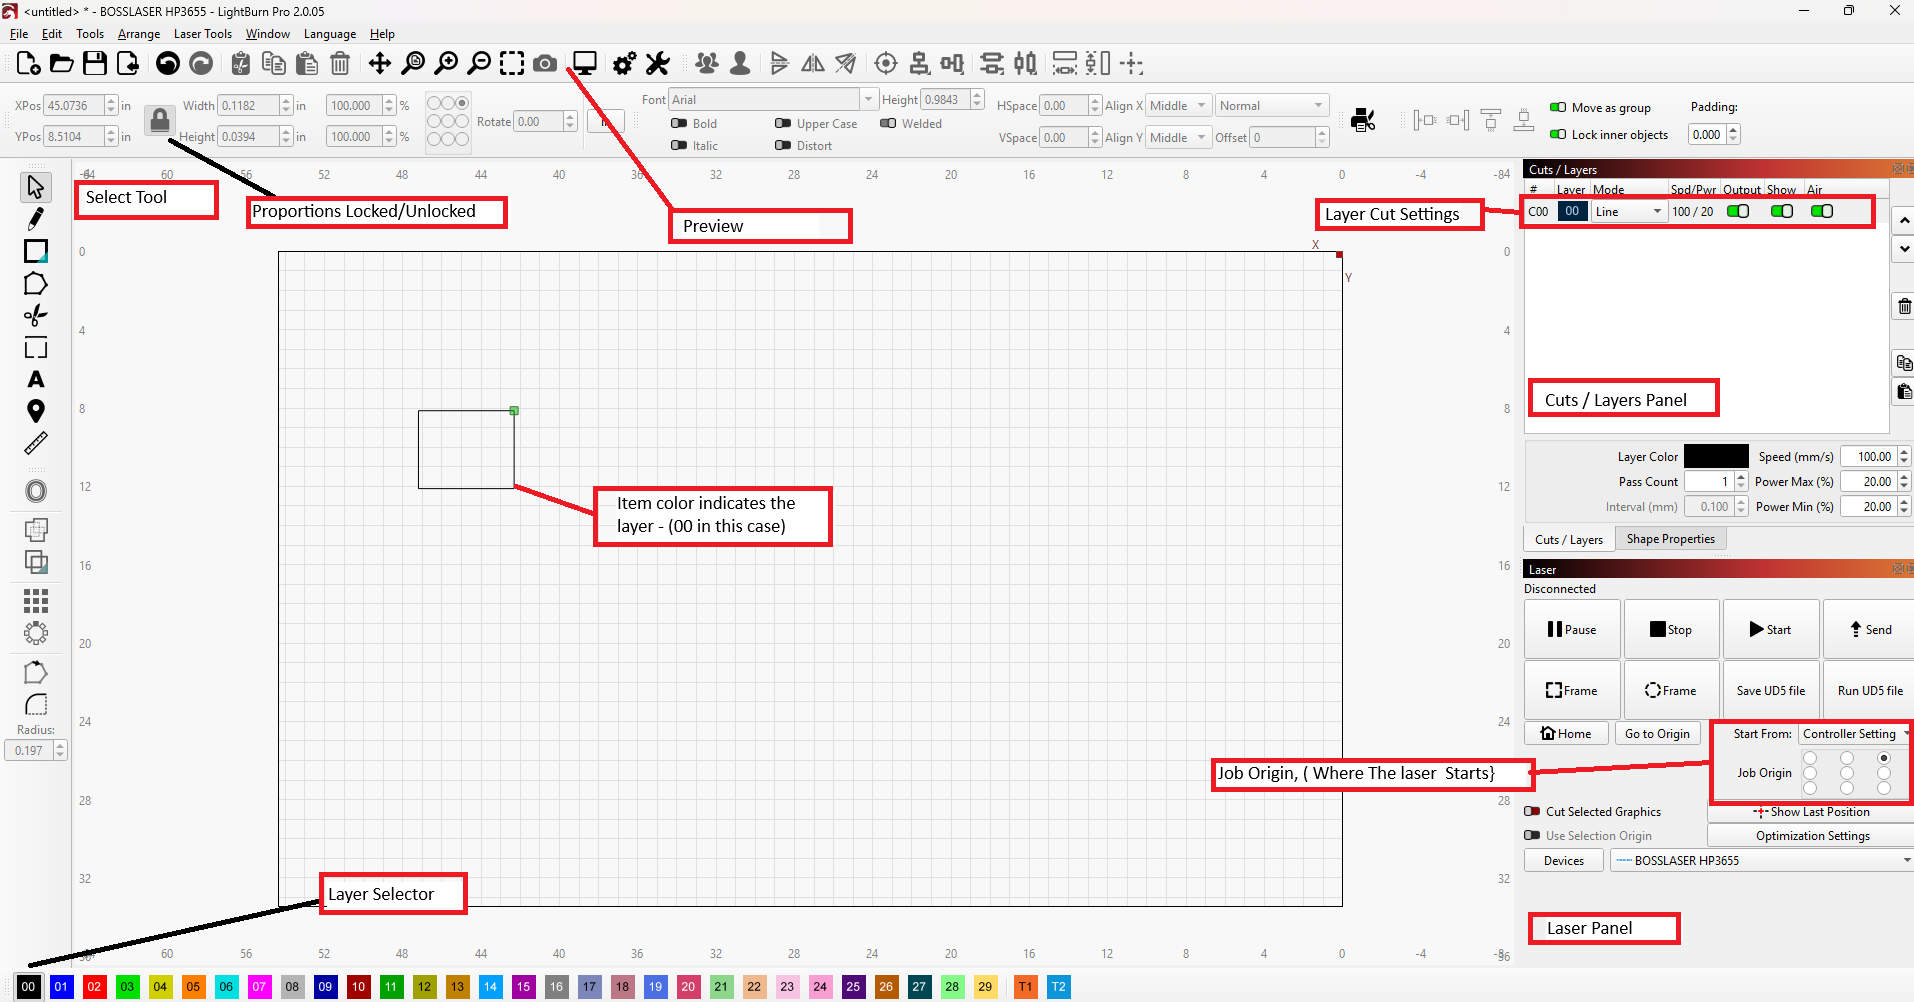
Lightburn General Interface
Lightburn is a user friendly vector file editor. It does a good job creating images and controls the laser settings required to engrave or cut designs.
Tool Layers and Sending Files
Processes in Lightburn are grouped into layers. All layers will receive the same settings. You can move different items to specific layers by selecting paths and then selecting a specific layer. The color will change to match the selected layer

Detailed Step Operations:
Speed and power settings
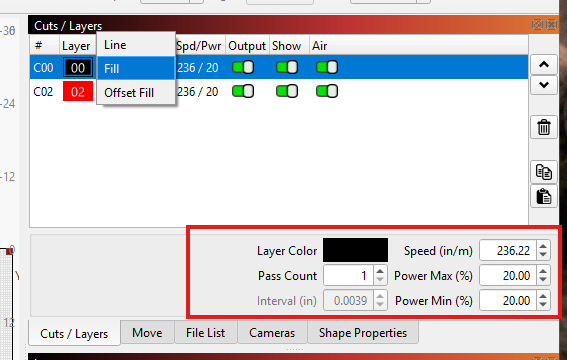
In the Cuts/Layers tab each layer has the option to be:
- Line: A line will trace the outside of a given tool path, this is used for outlines and cutting through material
- Fill: Fill is typically uused for engraving and will fill a shape
- Offset Fill: is not often used
Power settings can be specified by for each layer in the lower section of the box. Speed and power need to be adjusted depending on your material and weather you are cutting or engraving We have a speed and power table available.
Path details
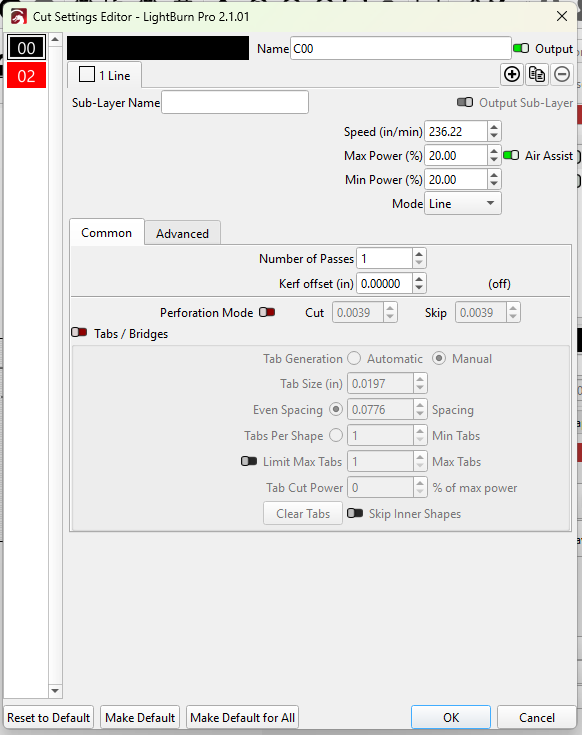
Fill settings can be changed when you double click on the layer. Fill direction and lines per inch can be modified to make fill processe more or less dense.
Sending projects to the laser
To send a completed project to the laser:
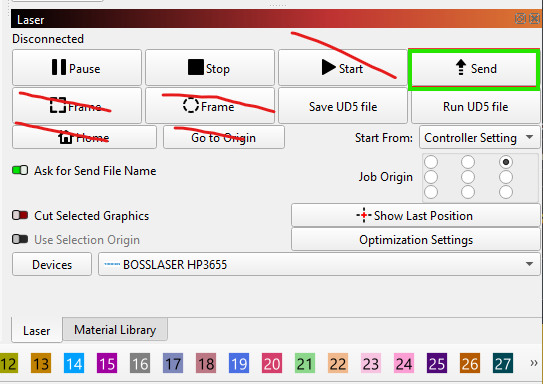
- Make sure the Bosslaser HP3655 is selected
- Select the Send button
- Send will send your file to the laser, it should beep and the LCD should show your project
- DO NOT PRESS:
- Start
- Frame
- These will direct the laser to fire which is unsafe if you are not watching the alser.